How Can We Help?
Building Faith Teams Forms
The First Step is to decide which TYPE of Form you want to Build.
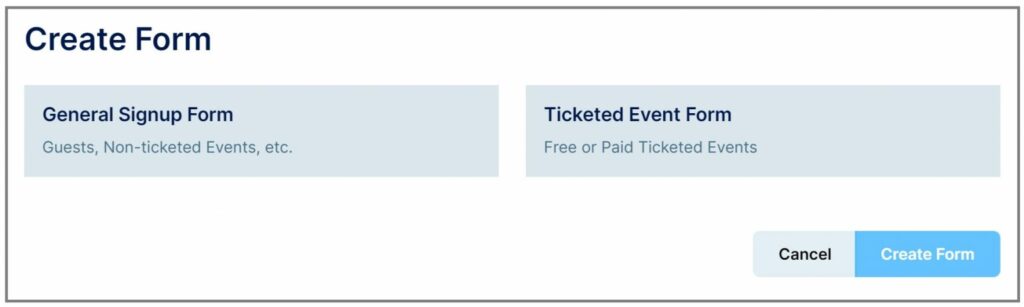
General Sign-Up Forms are for collecting information.
Ticketed Event Forms are for Registrations for things like Conferences and Trips.
NOTE: You can charge a registration fee with your Ticketed Event Forms, but you don’t have to. You can set the Registration as Free also.
After you choose which TYPE of Form you want, it’s time to Build your Form.
You’ll see different SECTIONS.
A section is simply a page of related fields and content, which is displayed to the end user one SECTION at a time, instead of showing the entire form all at once. This makes using the form easier and less overwhelming for the end user. We suggest that you keep sections & questions to as few as possible.
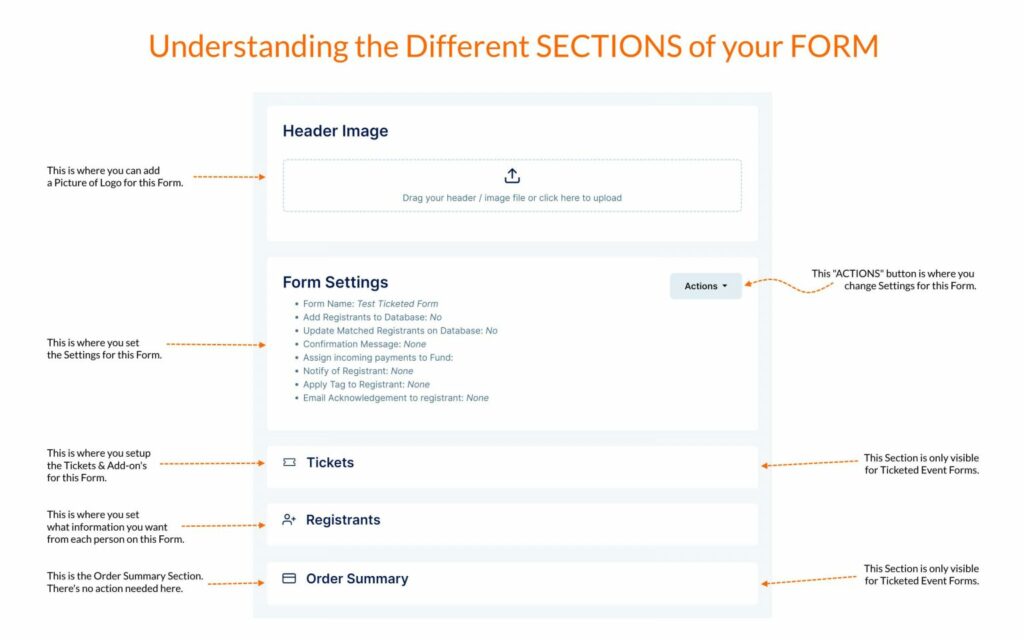
In the “Form Settings” Section, you have several options from the “ACTIONS” button.
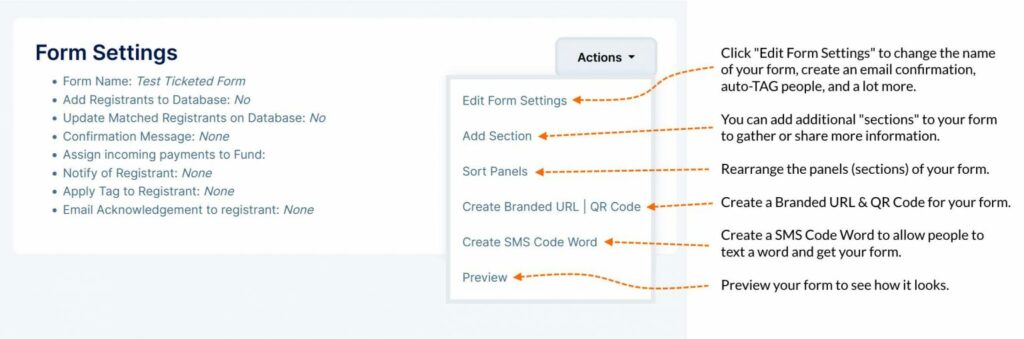
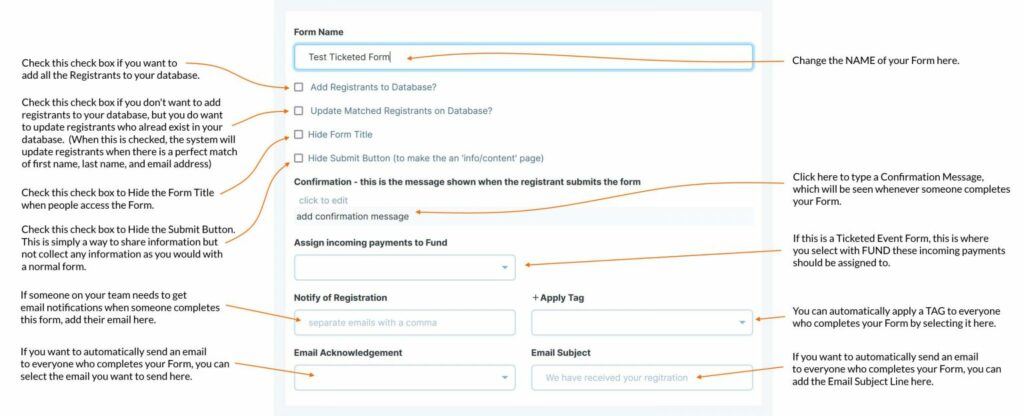
When you click “Edit Form Settings”, you have lots of options for how you want to set your form up.
Here’s an explanation of all the options on the “Edit Form Settings” page:
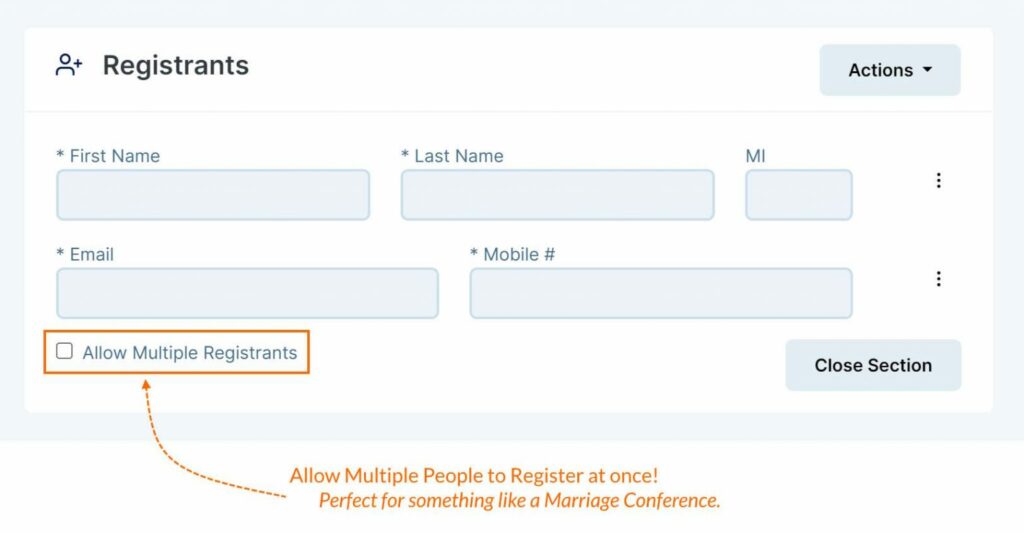
When you click the “Registrants” Section, this is where you will set the information you want to collect from each registrant.
A few notes about the Registrants Section:
- You can click the title “Registrants” and change it if you want to.
- For example: You could change it to “Enter your personal details below to Register”
- In the Registrants section, we DEFAULT to collect Name, Email, and Mobile Phone#
- You can add more Rows in this section to share information or collect additional information from registrants (description of how to do this later in this post).
- You’ll see a check box where you can “Allow Multiple Registrants”, which means multiple people can register at the same time (a huge time saver for couples and families).
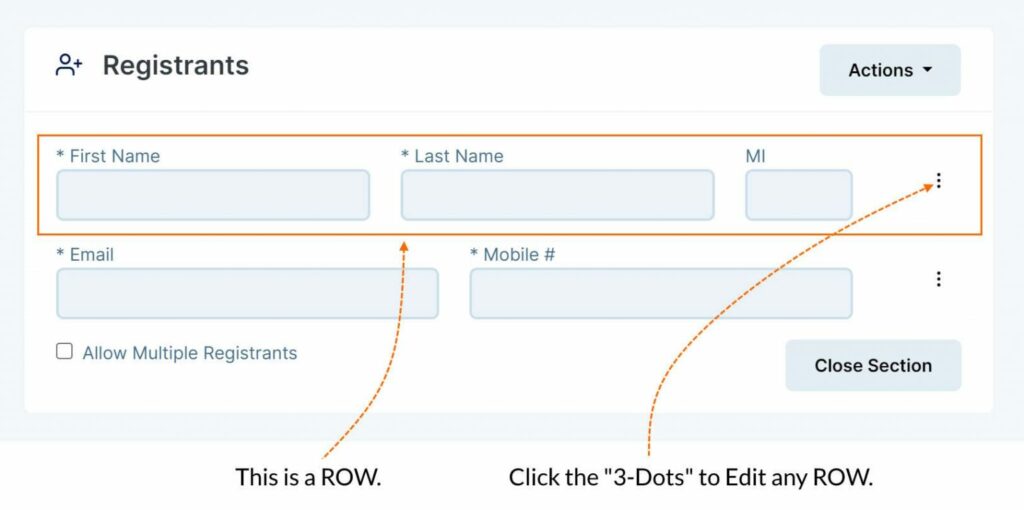
Inside the “Registrants” SECTION, you will see ROWS.
If you click the “3-Dots” on the right side of a Row, you can EDIT, COPY, or DELETE that Row.
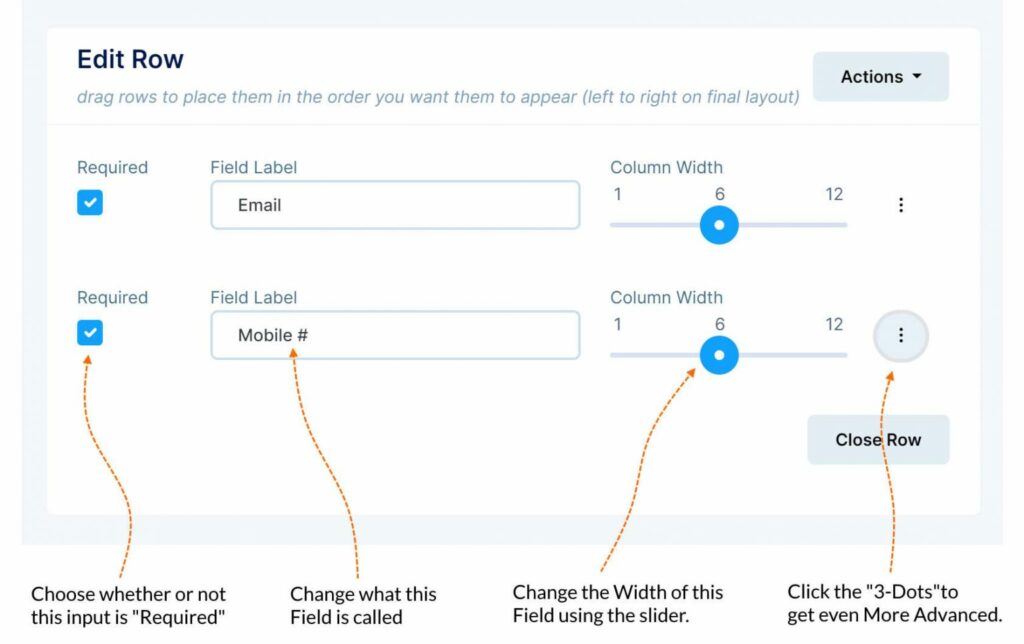
When you click the “3-Dots” to Edit a Row, you have some “Basic” options.
NOTE: You can also get even more Advanced, using “Conditional Logic”, Automatically TAG Registrants, etc. (We will cover “Advanced” editing in a different post).
Here’s a quick visual explanation of the Basic Editing Options when editing a Row.
Adding Rows
You can Add ROWS to a Section in order to collect all the information you need.
NOTE: The “Registrants” Section is where you will collect information about the REGISTRANT.
If you want to collect OTHER information on your Form, you should “Add a New Section” and add those Rows THERE.
But the process works the same in both sections.
To Add a New ROW:
Click “Actions”
Choose the Type of ROW you want to add.
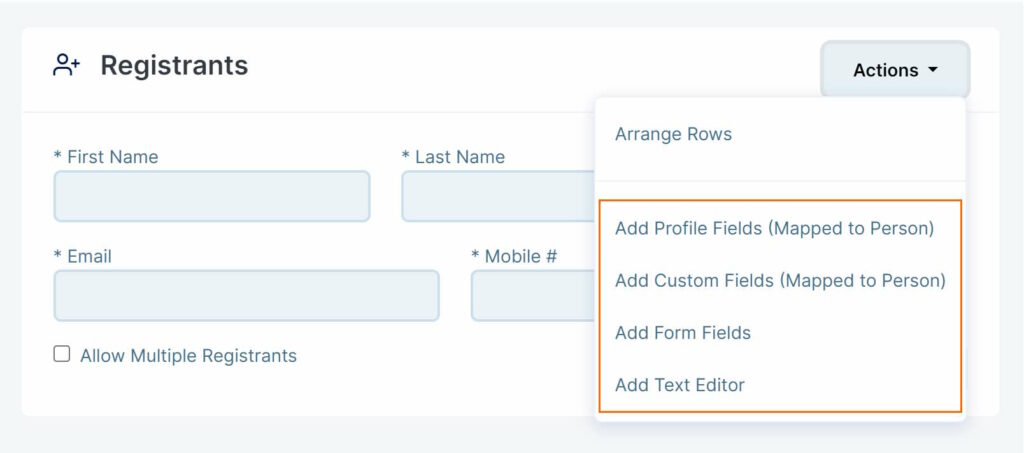
Here’s an Explanation of the different types of ROWS you can add to the Registrant Section:
Profile Fields (Mapped to Person): These are Profile Fields, such as Address, City, Gender, etc. These fields are “mapped” to a field on the Person’s Profile. This is powerful because it means that you can add a “mapped” field to your form and update a Person in your Faith Teams database.
Profile Fields (Mapped to Person): Same concept here… This is a way to add one of your Custom Fields to your form, and “map” it to the person in your database, easily updating your database through the form.
Form Fields: Form Fields are fields that can be added to a form with a label for other questions that you would like to ask the Registrant.
Here are the different “Form Fields” you can add:
- Text Field: This field type allows the Registrant to type an alpha-numeric response. It is appropriate for 1 word, or shorter responses.
- Text Area: This field type allows a larger, multi-row response. It is appropriate for longer responses to questions such as “How did you find us” or “Is there anything we can pray for?”
- Phone Field: This field allows you to collect US & Canada based phone numbers (without country code) in the format (999) 888-7777.
- Date Field: This field type allows you to collect DATE information and includes a convenient pop-up calendar selector to assist the Registrant in entering a date.
- Dropdown Field: This field type allows you to create a dropdown with a list of items. The user can select a single item.
- Multiple Choice Field: This field type allows you to create a list of items from which the user can select a single item.
PRO TIP: When using a Dropdown Field or a Multiple Choice Field, you can choose to Automatically TAG the Registrant based on the selection they make! This allows you to segment your database based on how users answer questions. (We will cover this in detail in a different post)
Text Editor: This is a WYSIWYG Editor that allows you to create content to be shown on your Form.
Think of it as a way to provide event information, including links, images, lists, and general content to your Form.
A great way to use the Text Editor is in the first section of your form, simply giving details about an event, or adding a welcome message.
For a guest form, this would be a great place to thank your guests for coming and share a little about your church.
Adding a New Section to you form
Once you get the “Registrants” section setup, you can Add a “New Section” to your Form if you need to share or collect additional information.
Remember, a SECTION is a page of related fields and content. Each SECTION will be shown to the end-user 1-page at a time, making it easy for them to flow through the form.
Once you have all your sections done, you can click “Actions” in the “Form Settings” section, then click “PREVIEW” to see a preview of your Form.
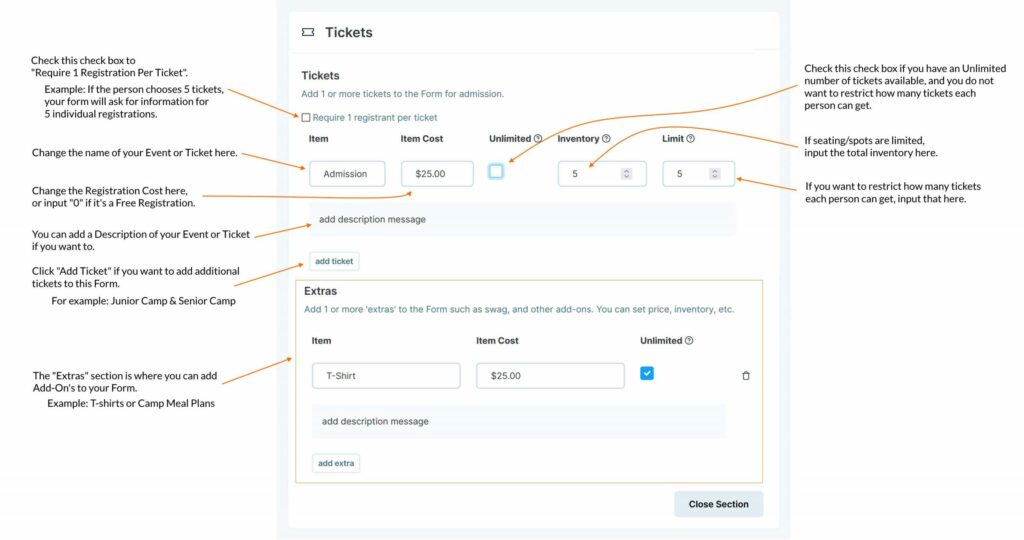
TICKETS
Think of “Tickets” as Registrations for an event.
- It can be a Free Event or it can have a Registration Fee.
- It can have Limited Seating or you can allow Unlimited Seating.
NOTE: For Ticketed Event Forms, the “Tickets” section is the FIRST section the end-user should see.
They first choose how many Tickets they need, then the will input Registrant information for each ticket.
When you click the “TICKETS” section, you’ll have lots of options and flexibility of how you want to set up your Tickets.
You can also do “Add-ons” where registrants can add additional things to their registration, such as a T-shirt when they are registering for camp.
Here’s an explanation of everything you’ll see when setting up your Tickets and Add-ons.