How Can We Help?
Groups
Groups are a way for your church to meet in smaller communities where group members can share, grow, learn and care for one another. Faith Teams offers the perfect way for you to help organize your groups, communicate within a group, take attendance, and more.
Creating Group Types
Groups are managed under a parent container called “Group Type”. Examples may be Small Groups, Membership Groups, Discipleship Groups, Activity or Youth Groups. Before you can create an actual Group, you must create a Group Type. You will assign all groups to the appropriate Group Type.
* You may have only a single Group Type such as “Small Group” and that’s ok. Just remember, it is a requirement and anybody signing up for a group will see groups listed under your Group Type(s).
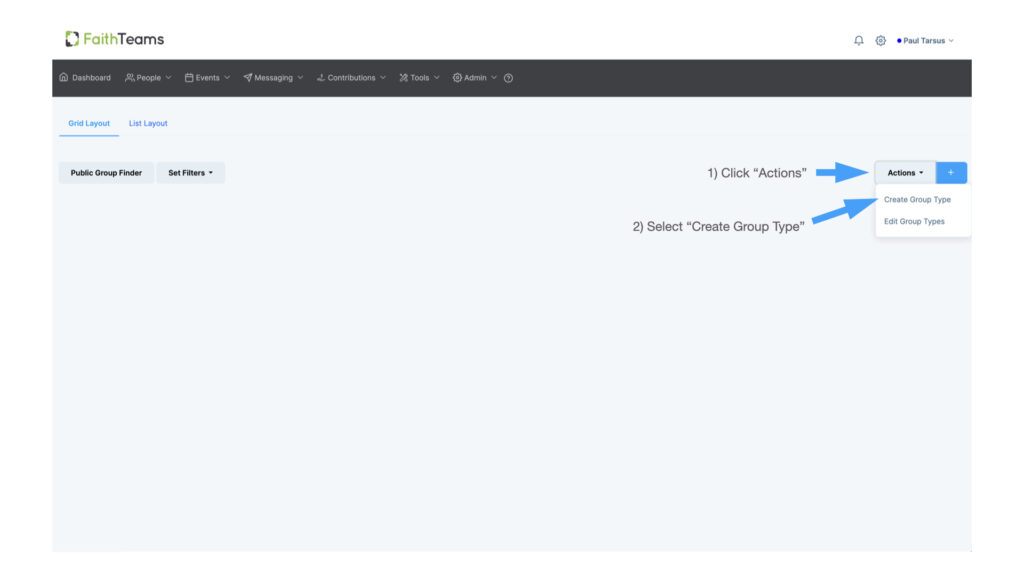
To create a Group Type, from the Groups page, click the “Actions” button, then select “Create Group Type”.
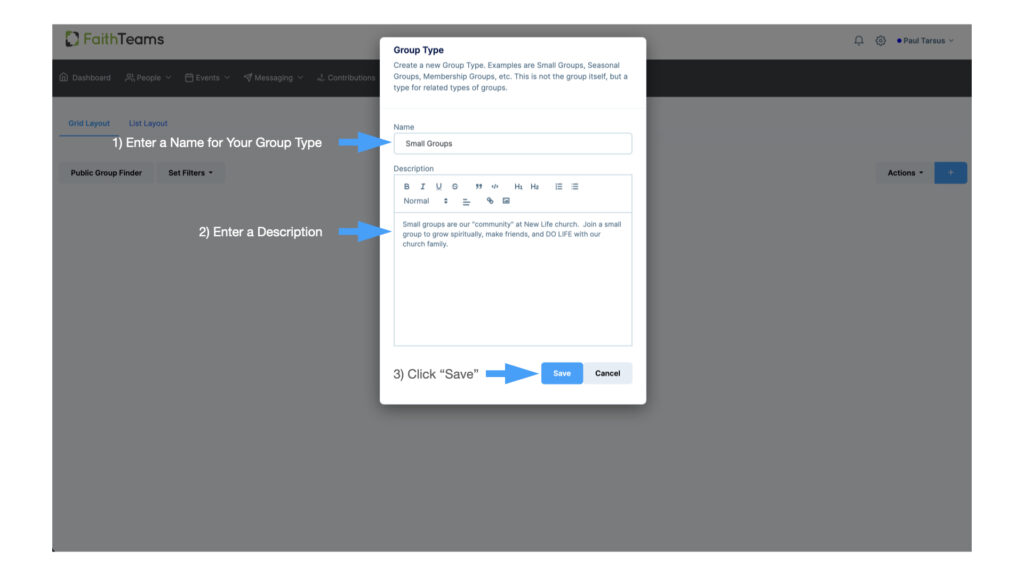
Enter the name of your group type (example, Small Groups) into the Name field, and enter in a description.
The description provides prospective group sign-ups what the purpose of our groups is. Next, click “Save”. That’s the only time we’ll need to create this Group Type (example, Small Groups). We can create other Group types if our church ever needs any other types of Groups.
Creating Groups
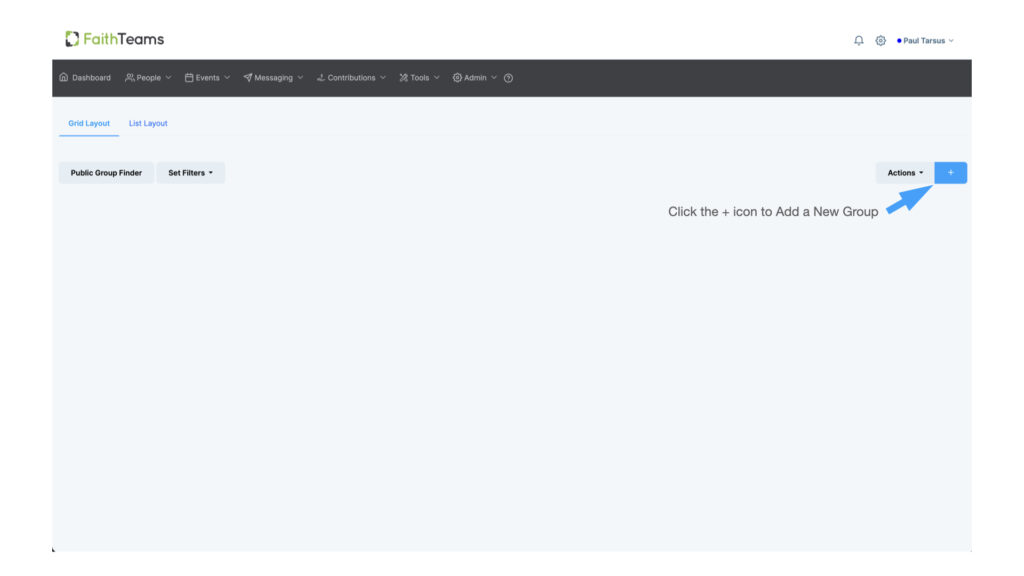
Now we’re going to actually create our 1st Small Group. On the main Groups page, Click the blue “Plus” icon.
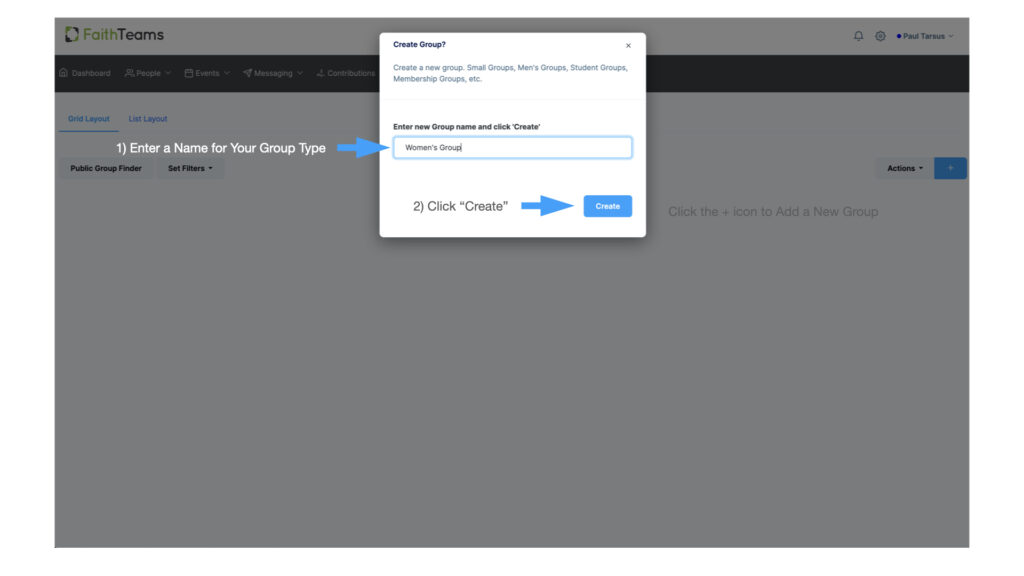
Enter in a name for your new group. Click “Create”.
Group Settings
This is the place where we setup your group: What potential sign-ups will see, a group photo, information, location, etc.
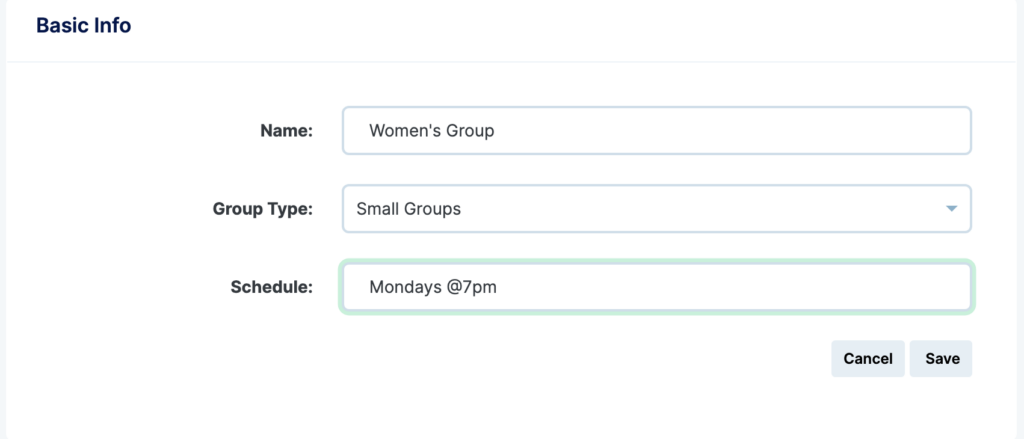
Basic Info
Name: The name of the group. It may be helpful to put the Leader’s Name on here as well if your members wish to see the leader of the group by name.
Group Type: Select your Group Type. This will categorize all related groups together on the Group Finder Page (i.e. Small Groups will appear together).
Schedule: A text field for a basic representation of when the group meets: Examples include Monday @7pm. 1st & 3rd Friday at noon, etc.
Basic Info Section
Visibility & Enrollment Section
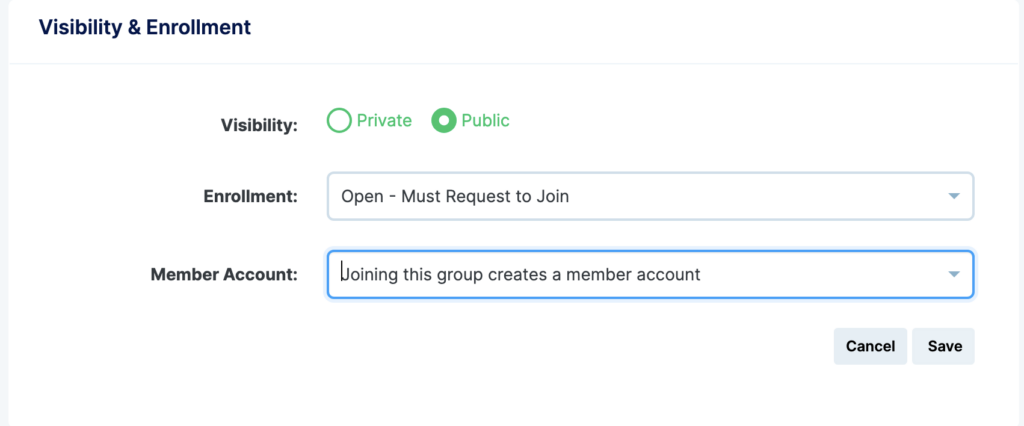
Visibility & Enrollment
Visibility:
- Public: Visible on the Group Finder Page
- Private: Only a direct link will show the Group Signup, and it will not show on the Group Finder
Enrollment:
- Open: Enrollment is Open for this group and people can signup
- Close: Enrollment is Closed for this group and people cannot signup
Member Account:
- Creates a Member Account: Once a person is accepted into the group, a User Account on the Faith Teams platform is created for the person if one does not exist. He/She will receive an email to set the password, and instructions on signing in.
- Does not create a Member Account: The system will not create an account for the user by signing up
Enrollment Rules
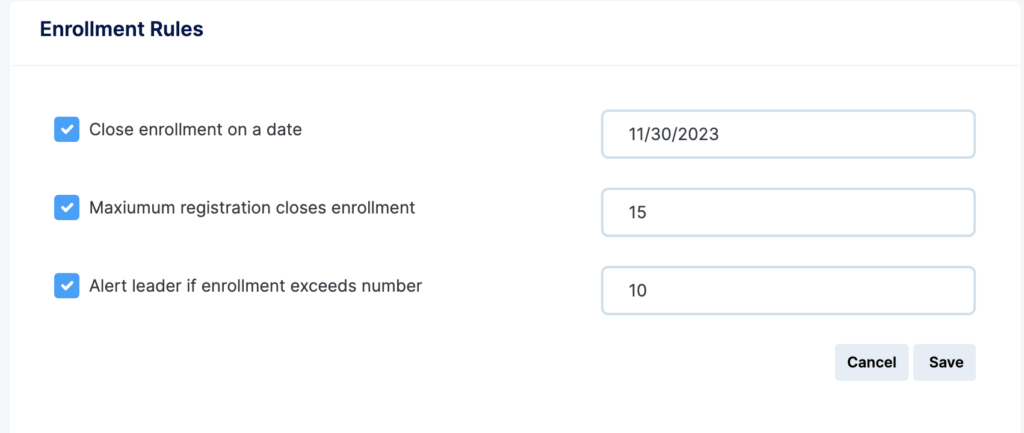
Close enrollment on a date: Add a date if you wish to close enrollment on a certain date.
Maximum registration closes enrollment: If a number is entered, the maximum enrollment count for this group. Once this number is reached, no new enrollment can occur.
Alert leader if enrollment exceeds number: If a number is entered, alert the leader(s) via email when enrollment exceeds this number.
Enrollment Rules Section
Group Categories Section
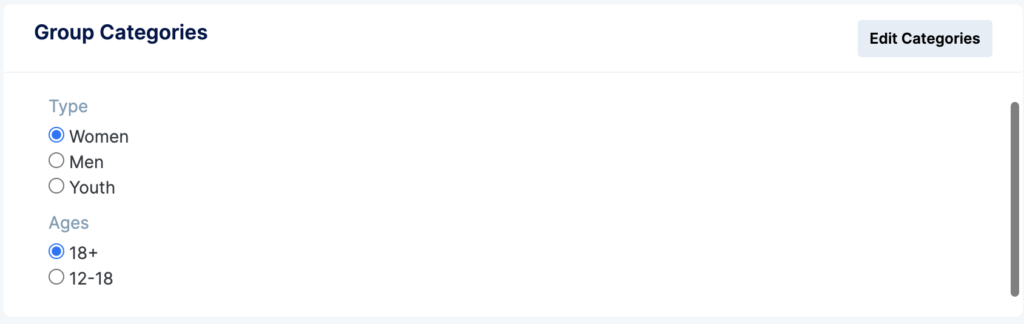
Group Categories
Click “Edit Categories” to create your various categories and options. Prospective groups signups will see these categories and options in a “filter” to help find a group that is the right fit. Age, Childcare Provided, Gender, Interests, etc. make for great categories to filter by.
Click here for a knowledge base article on creating Group Categories
Once your categories are created, select the right category for your group
Group Meeting Location
Group Location: Select from a list that you have created. Group locations can be specific addresses or simply named locations. Those who a specific address can show an exact radius on a map OR a radius, to maintain privacy but provide an approximate location.
Click here for a knowledge base article on creating Group Locations
Once you have created your locations, select and save your location for your group.

Group Meeting Location Section

Group Image Section
Group Image
Upload an image of a .jpg or .png type. Image characteristics should be roughly 4:3 or 16:9 ratio (wider than tall) and no more than about 1200 pixels wide.
Examples Image Sizes:
- 900 pixel height x 1200 pixel width (4:3)
- 675 pixel height x 1200 pixel width (16:9)
Click or Drag an image to upload. Once uploaded, click the trash can in the top-right to delete.
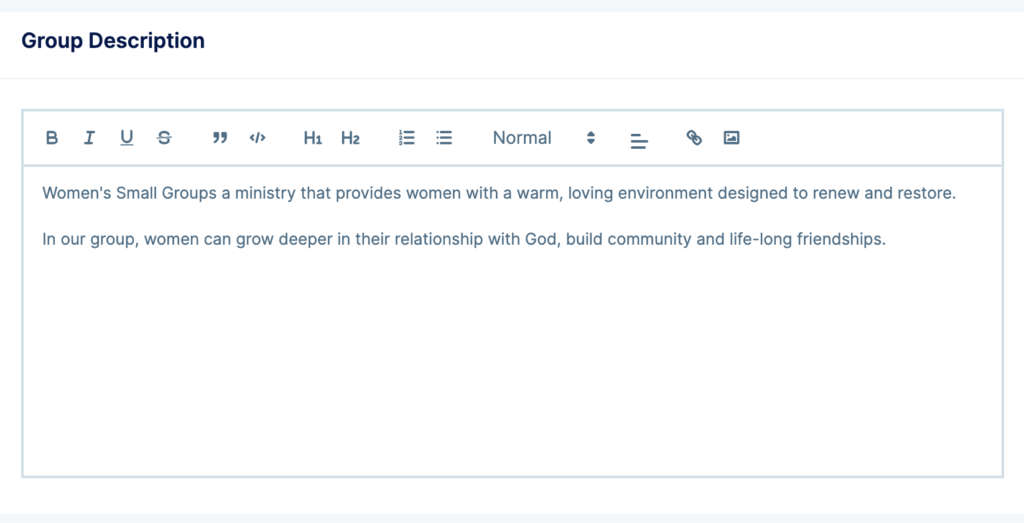
Group Description
Give your group a nice description. You can included details about the group, lists, and even links to outside resources. Think of this as your way to “Sell” your group to those who are taking a look at it to see if they might like to sign-up for your group.
Group Description Section