How Can We Help?
Setting Up Online Giving
Before you can use any of the features with Faith Teams Giving, you need to Activate and Setup Online Giving for your church.
Step-by-step instructions are below. You will need the legal information of your church (according to the IRS) and some personal information for an Owner/Legal Representative of your church.
NOTE: The financial data for your church will not be reported to the IRS for this person; this is simply for validation of your account and protection from fraudulent activity. Also, this information is not stored within Faith Teams, and it will not be visible to anybody once the information is entered into the system. Our payment processor runs a background check to check for illegal activity and to validate the account.
Two NOTES about Online Giving:
- Some people wonder why you need to submit the information in these sections, but what you are setting up is a Legit Payment Processing system for your church, so there is some liability involved. This information will be required no matter what platform you are using. Faith Teams makes the whole process as painless as possible.
- The financial data for your church will not be reported to the IRS for this person; this is simply for validation of your account and protection from fraudulent activity. This information is not stored within Faith Teams, and it will not be visible to anybody once the information is entered into the system. Our payment processor runs a background check to check for illegal activity and to validate the account.
Complete the 6-Steps Below to Activate and Setup Online Giving:
Step 1: Get Started
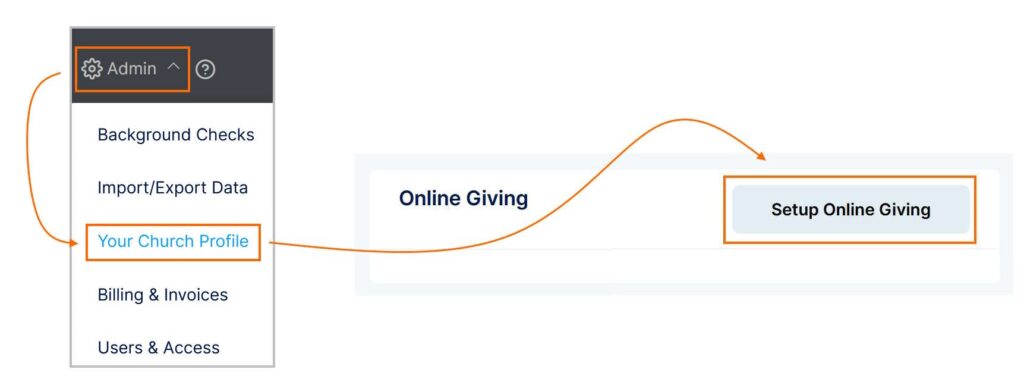
- Go to “Admin” in the menu, and select “Your Church Profile”.
- Then click “Setup Online Giving”.

Step 2: Activate
- Click “Activate” to activate Online Giving for your account.

Step 3: Church Tax ID Info
- Input the Official Registered Name of your church and the Federal Tax ID / IEN
- Click “Update” for this section.

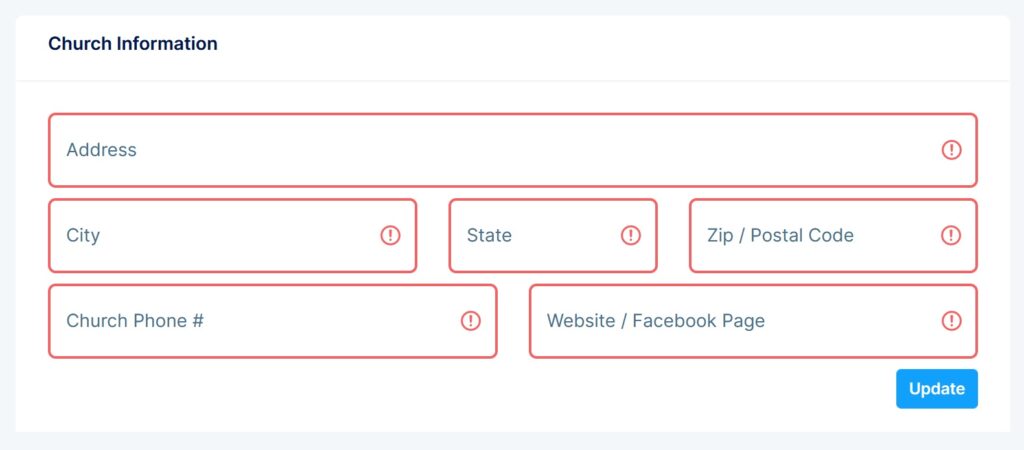
Step 4: Church Info
- Input the Address, City, State, Zip Code, Phone Number, and either your church Website or Facebook Page
- Click “Update” for this section.

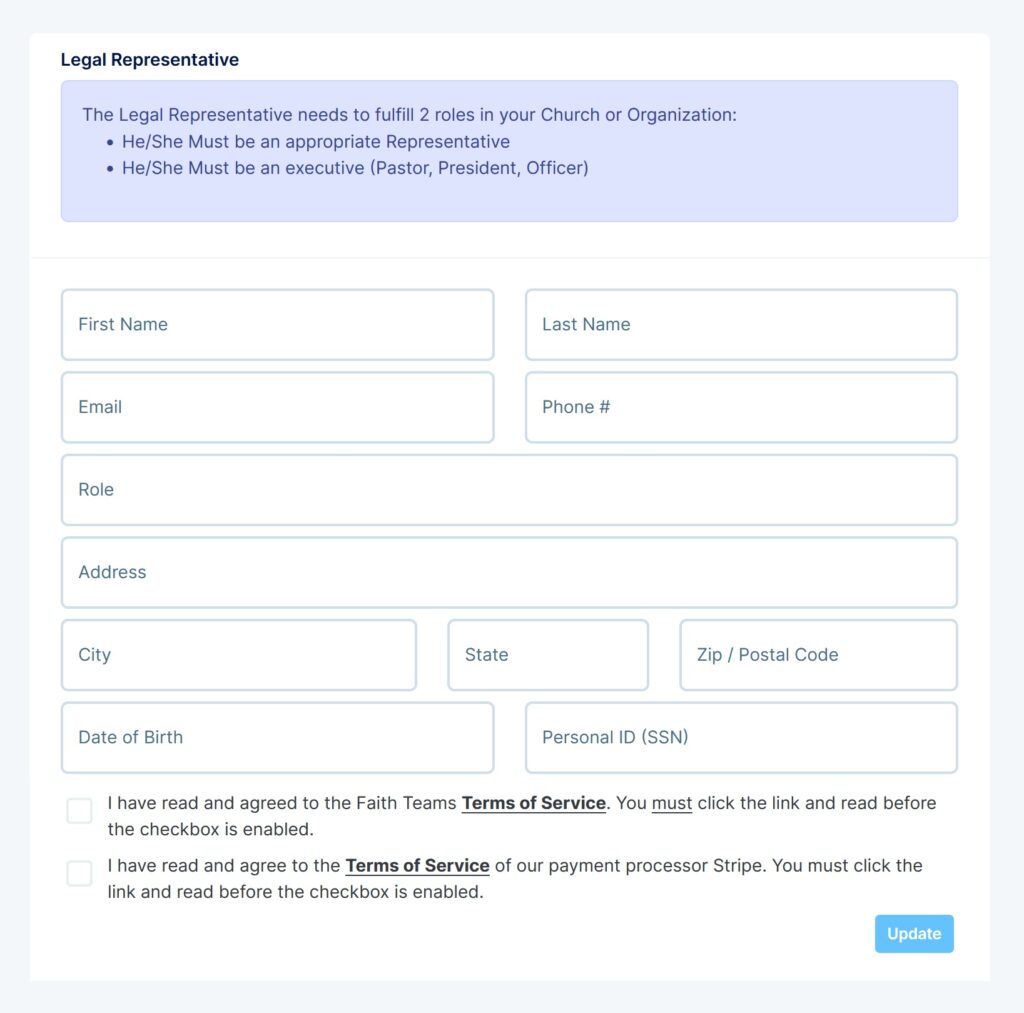
Step 5: Legal Representative Info
- Input the Name & Personal Information of a person who is a Legal Representative of your church.
- NOTE: Some people are nervous about inputting their SSN. We do not retain this information anywhere. It is simply for validating the authenticity of your account.
- Click BOTH checkboxes to agree to the Terms.
- Click “Update” for this section.

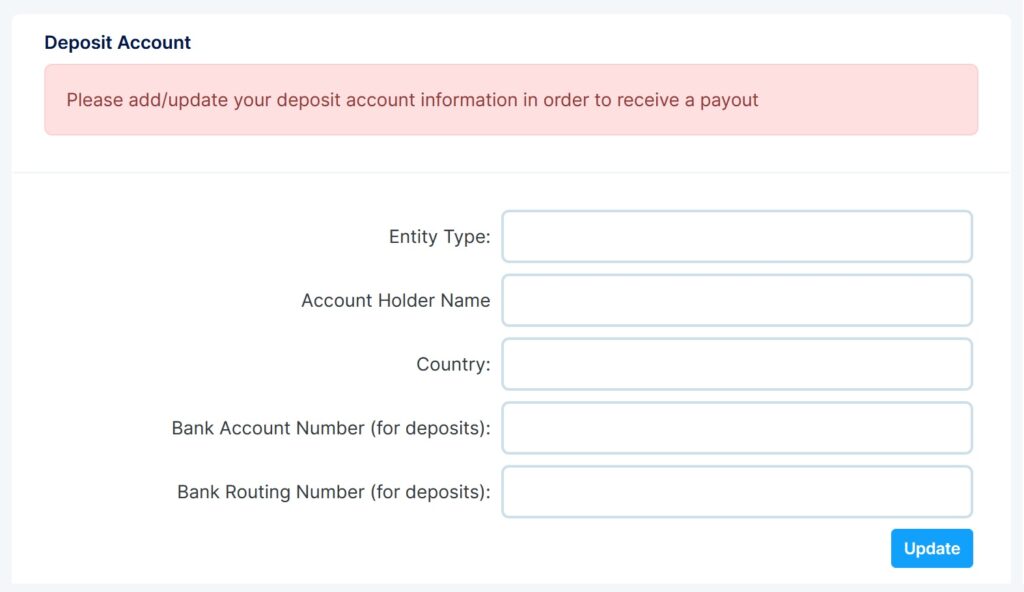
Step 6: Bank Info
Input the Bank Information for the Bank Account you want Funds Deposited Into
- Choose the Entity Type
- Inout the PERSON’S Name who is on the Bank Account
- Input the Country
- Input the Bank Account Number
- Input the Routing Number
- Click “Update” for this section.

Once you have successfully completed each section, you should be Ready to Go!
If you have any problems working through this setup, please contact us and we will help you resolve any issues you are having.
