How Can We Help?
Setting up Labels and Kids Check-in
When you set up Kids Check-in and Label Printing for your church, you will be able to check a family in, print labels for each child, and another label for the parent/guardian to use when picking their kids up. This is a great way to enhance security in your Kid’s Ministry areas.
Quick Note:
First of all, understand this: Label Printing is set up at the CLASS LEVEL.
Remember, when you are doing check-in, each of your environments is considered a CLASS (even your main auditorium worship service will be a “class”).
Label Printing is set up at the “Class” Level, which makes it very flexible, allowing you to print labels for only the classes you want to.
Set up Label-Printing & Kid’s Check-In Options:
- From the Menu, click “Events”, then click “Calendar”.
- Click on any occurrence of the event you want to set up label printing for, then click “Check-In”.
- For this setup process, you can choose either “Family Check-In” or “Roster Check-in”.
- From the Check-In screen, click the GEAR ICON near the top right of the screen to access your List of Classes.
- Beside the class you want to set up label printing for, click “Label Settings”.

After you click “Label Settings”, you’ll see these options:
- Print Labels upon Checkin for this Class?
- Allow Checkouts for this Class?
- Require certain information is captured for Checkin?

Print Labels for this Class:
- When you check this checkbox, labels will instantly print when you check a person into this class.
- When checking in a family, a label will be printed for each child, and a separate label will be printed for the parent/guardian.
- You can also select up to 3 things you would like to be printed on each child label.
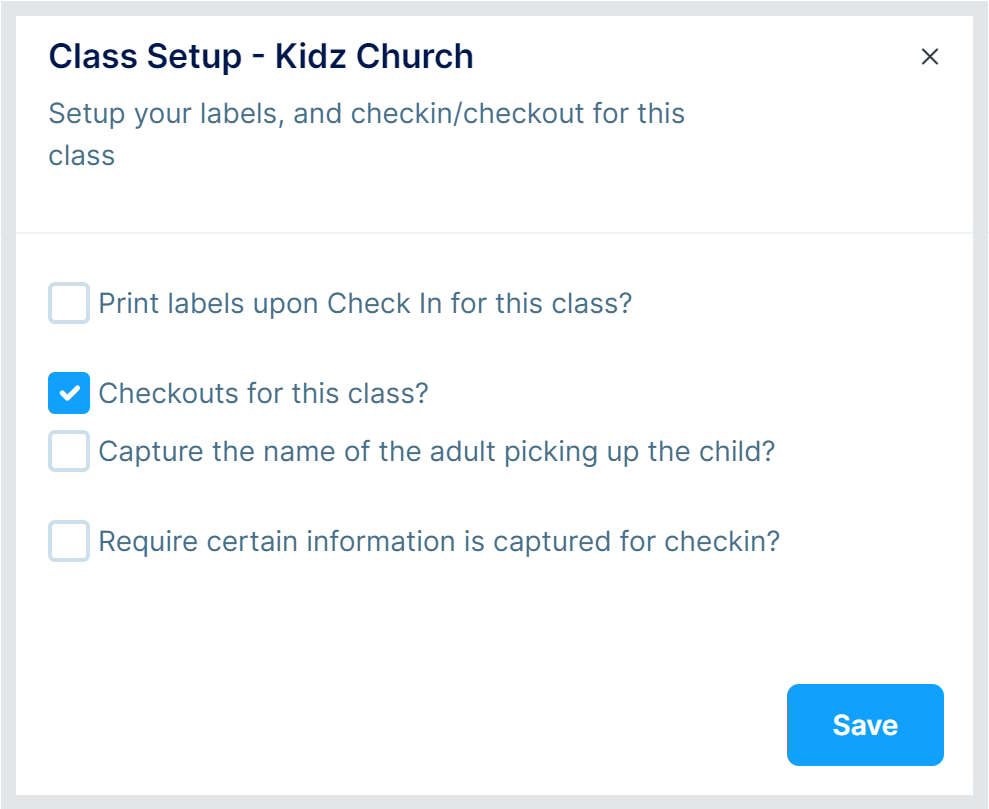
CheckOUTS for this Class:
- When you check this checkbox, you will be able to record when a child was checked OUT of this class.
- The process for checking kids OUT is the same as checking them IN, except you will click the “Shield” to check them out.
- You can also check the checkbox to require the Name of the person who checked them out.
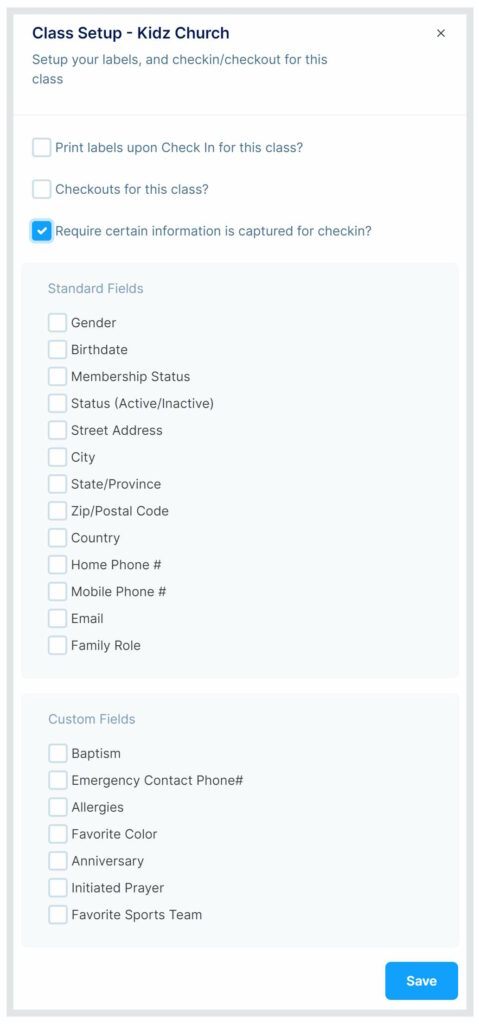
Requiring Information to be Captured for Check-in:
- When you check this checkbox, the system will look for certain information for the person checking in, and if it doesn’t exist in your database, your check-in team will be prompted to ask for it before they can be checked in.
- Example: Requiring an Emergency Contact Phone # is on file.
- You can choose to require information from all the Standard Profile Fields or from your Custom Fields.